To create the connection between Google Workspace and vScope, you need a super admin account in Google Workspace. In this guide we’ll walk you through how to create a project with sufficient read permissions in Google Workspace that will allow vScope to inventory your Google Workspace directory.
By adding Google Workspace to your inventory, you’ll be able to view user accounts, groups and devices in vScope.
Part 1 – Creating a project & service account on Google Cloud Platform
a)
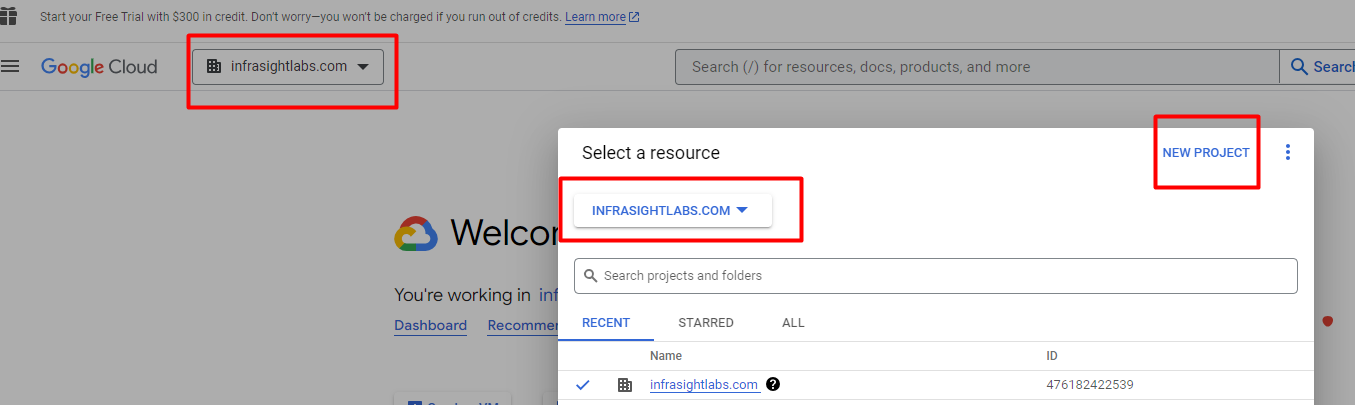
Log in to console.cloud.google.com with your super admin account. Select Resource and click “New Project”.
b)
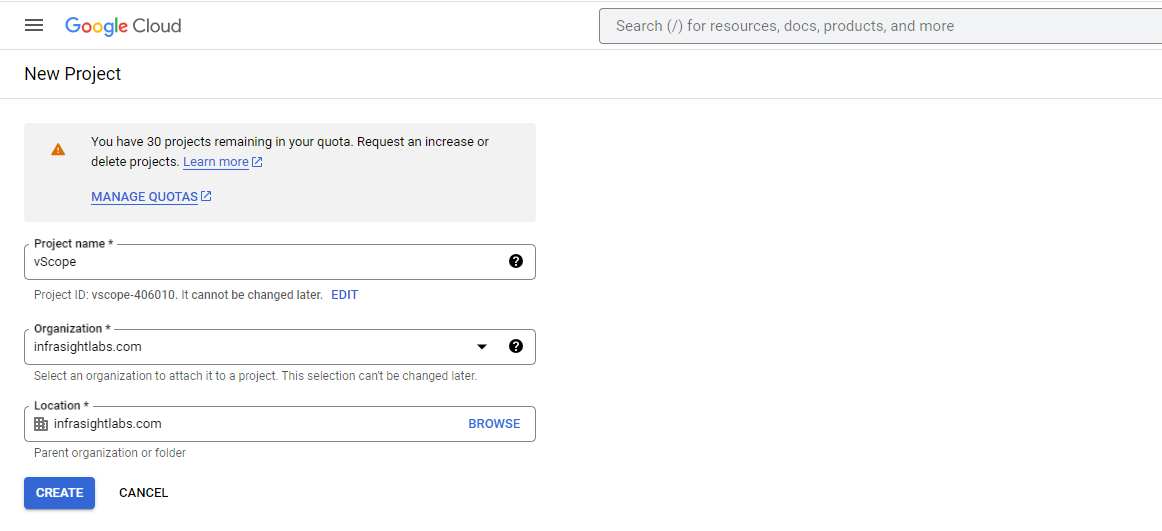
Choose a project name eg. vScope. Select “Organization” and “Location”, then click “Create”.
c)
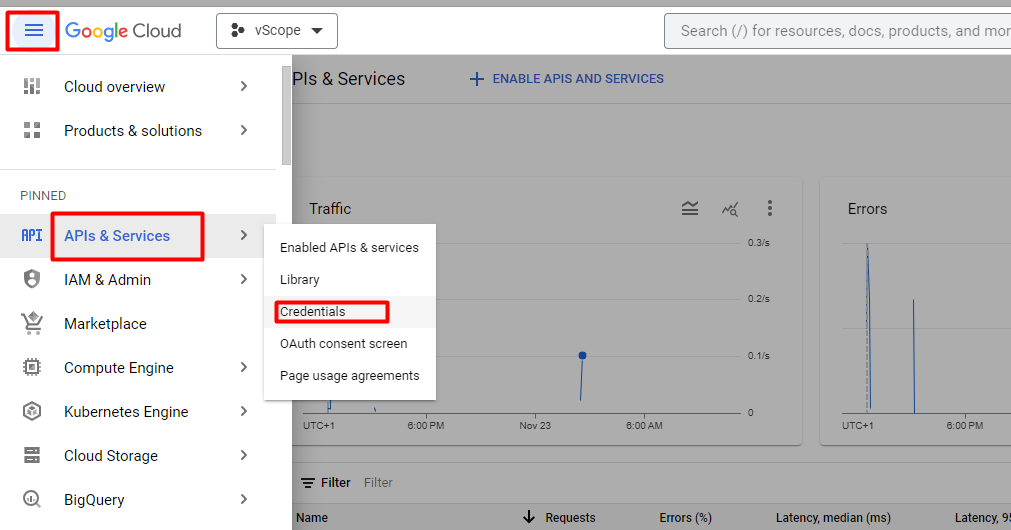
Next step is to create a credential. Go to the navigation menu in the top left corner and go to “API & Services” and click “Credentials”.
d)
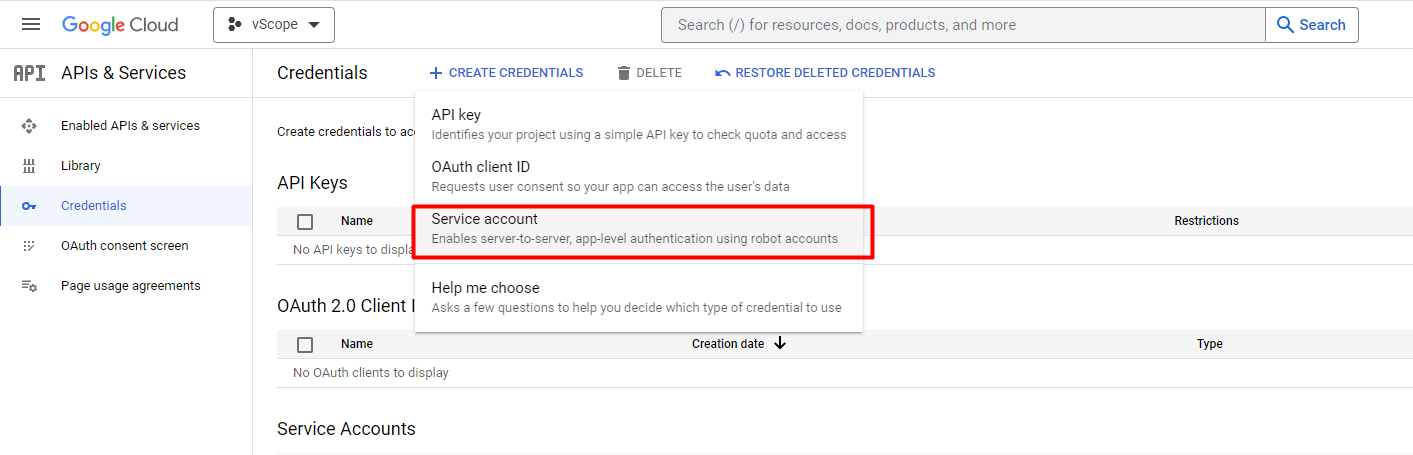
Click on “+Create Credentials” and choose “Service account”.
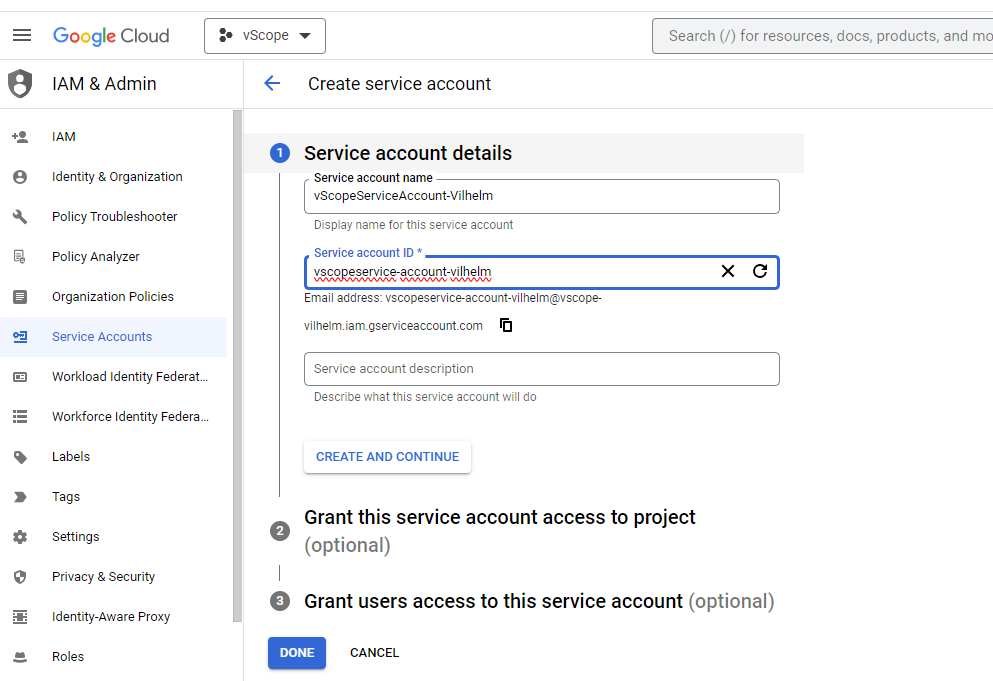
e)
Service account details – Enter your preferred details for the service account and click “Create and continue”.
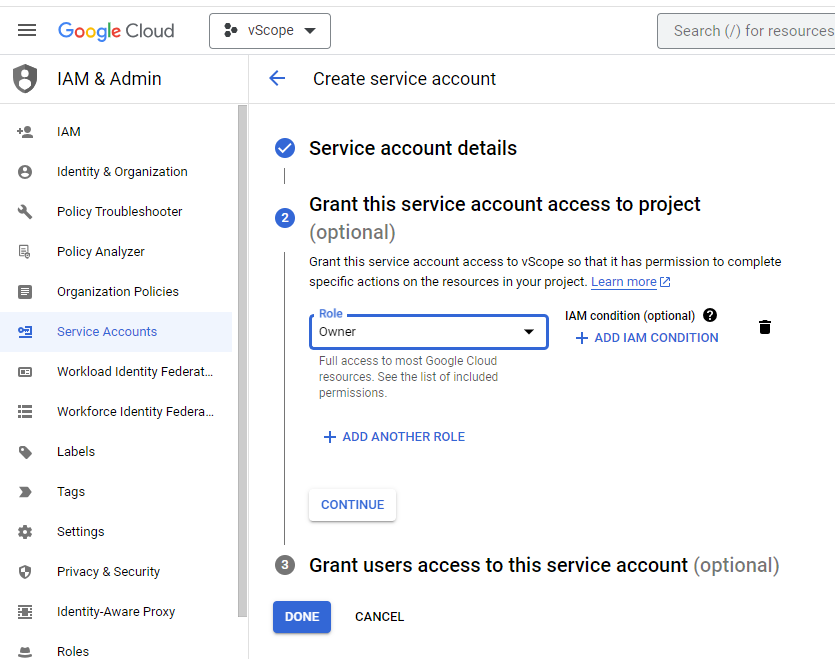
f)
Service account permissions – Select the role “Owner” and click “Continue”.
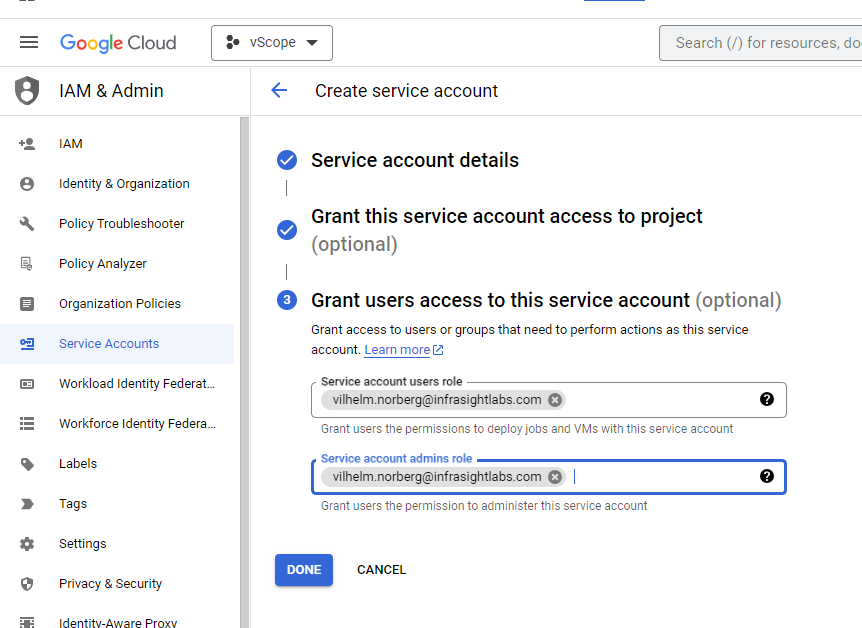
g)
Set yourself as service account admin and click “Done”.
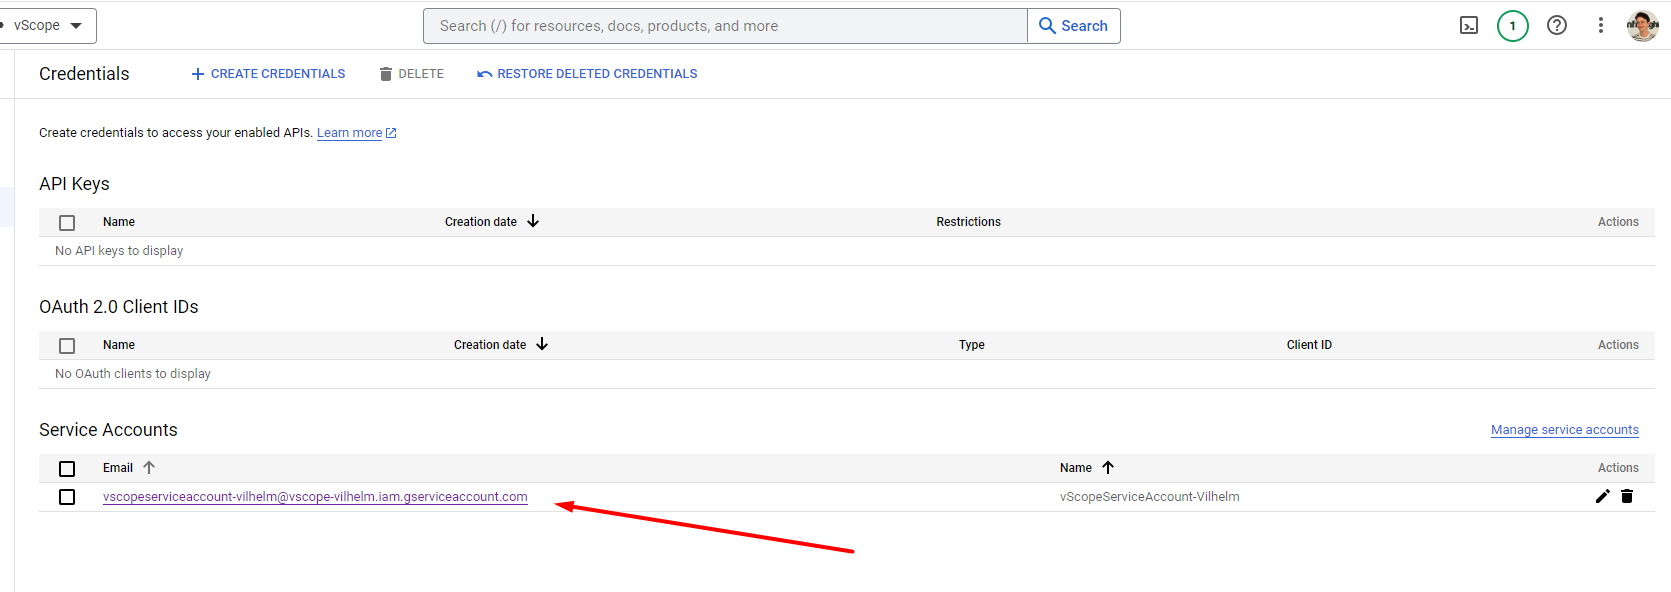
h)
Enter the service account by clicking the email address
i)
In the “Keys” tab, click on “Add Key” and then “Create new key”.

j)
Choose Key type JSON and click “Create”.
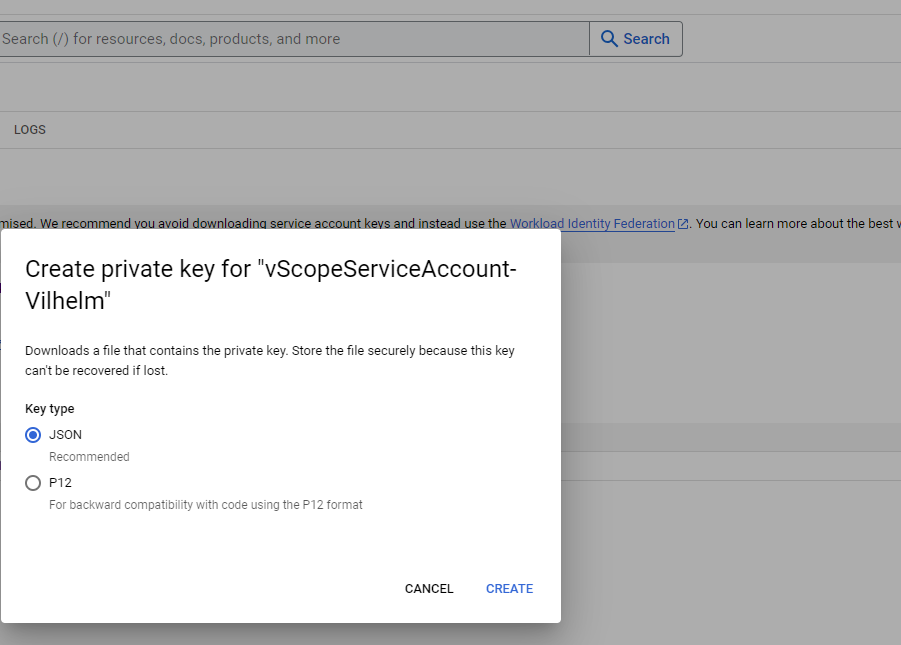
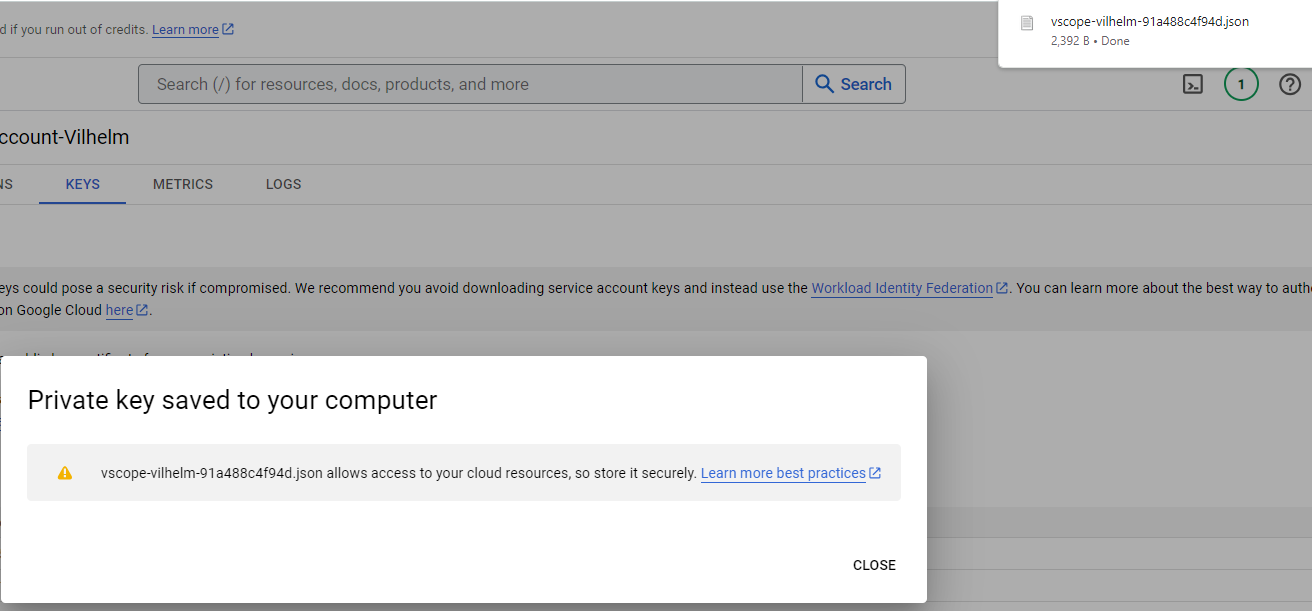
k)
The key is now downloaded to your computer. Make sure you store the key somewhere safe.
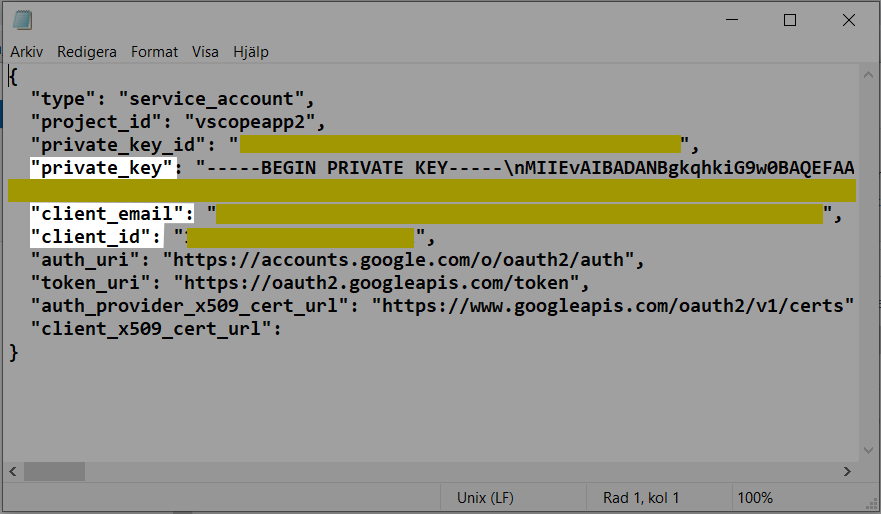
l)
Open the key with NotePad. You’ll need these values later: “private key“, “client_email” and “clientID“.
Part 2 – Set up OAuth for the application
a)
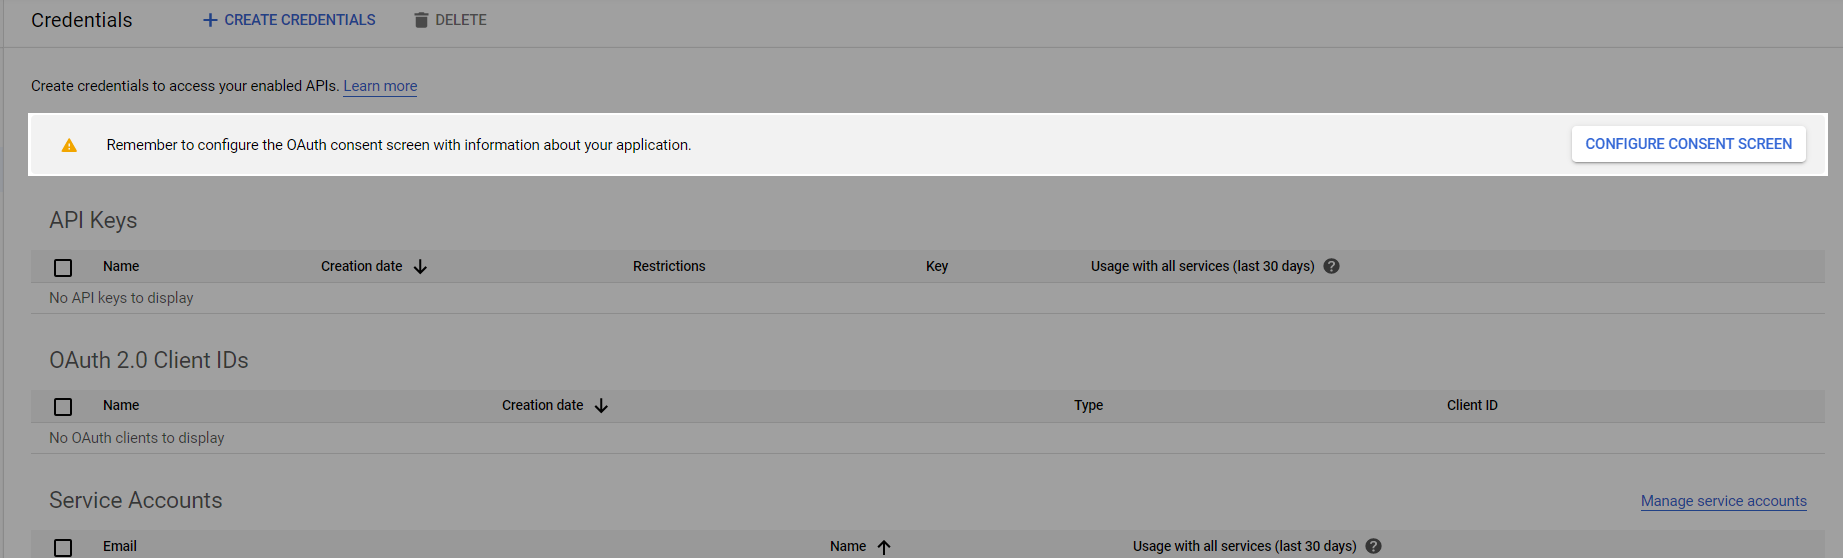
Now it’s time to set up some permissions. Go back to the Credentials page.

b)
Click on the “Configure Consent Screen” button.
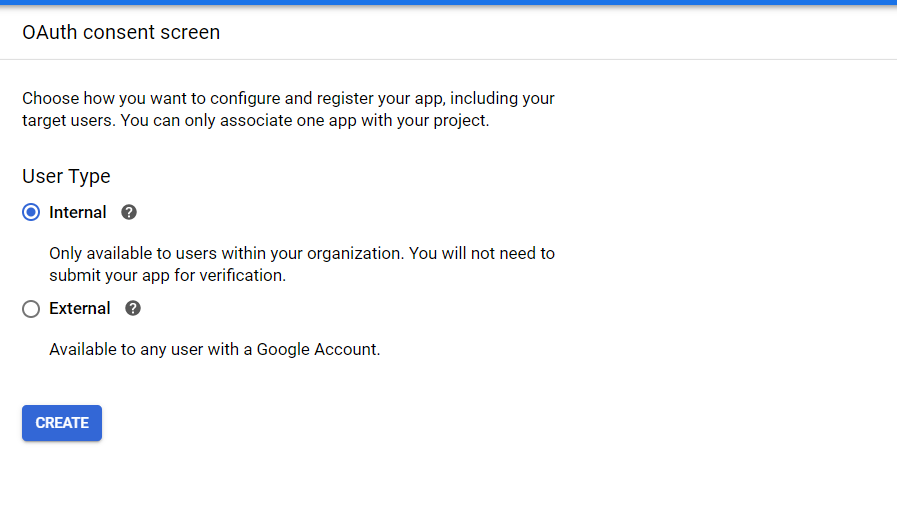
c)
Select “Internal” and click “Create”.
d)
Enter your preferred App name and a User support email**. Scroll down, add Developer contact information** and click “Save and continue”
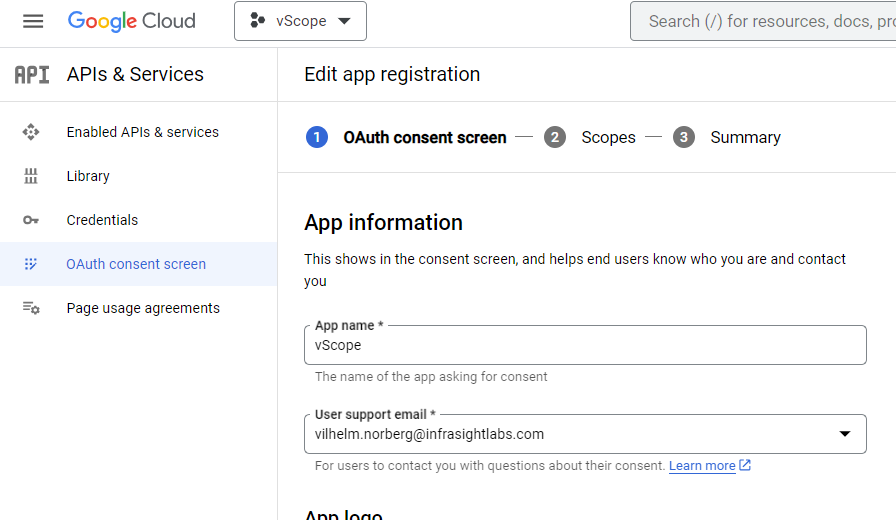
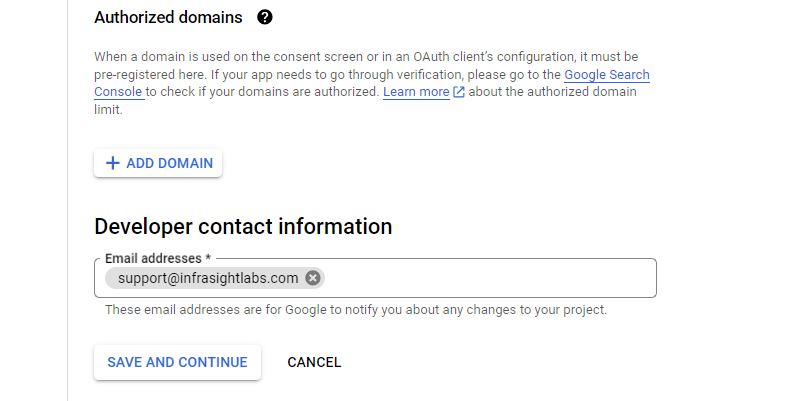
**This information is an requirement of Google, however, it’s not relevent to your Google inventory in vScope.
Part 3 – Enable domain-wide delegation for the service account and add API scopes
a)
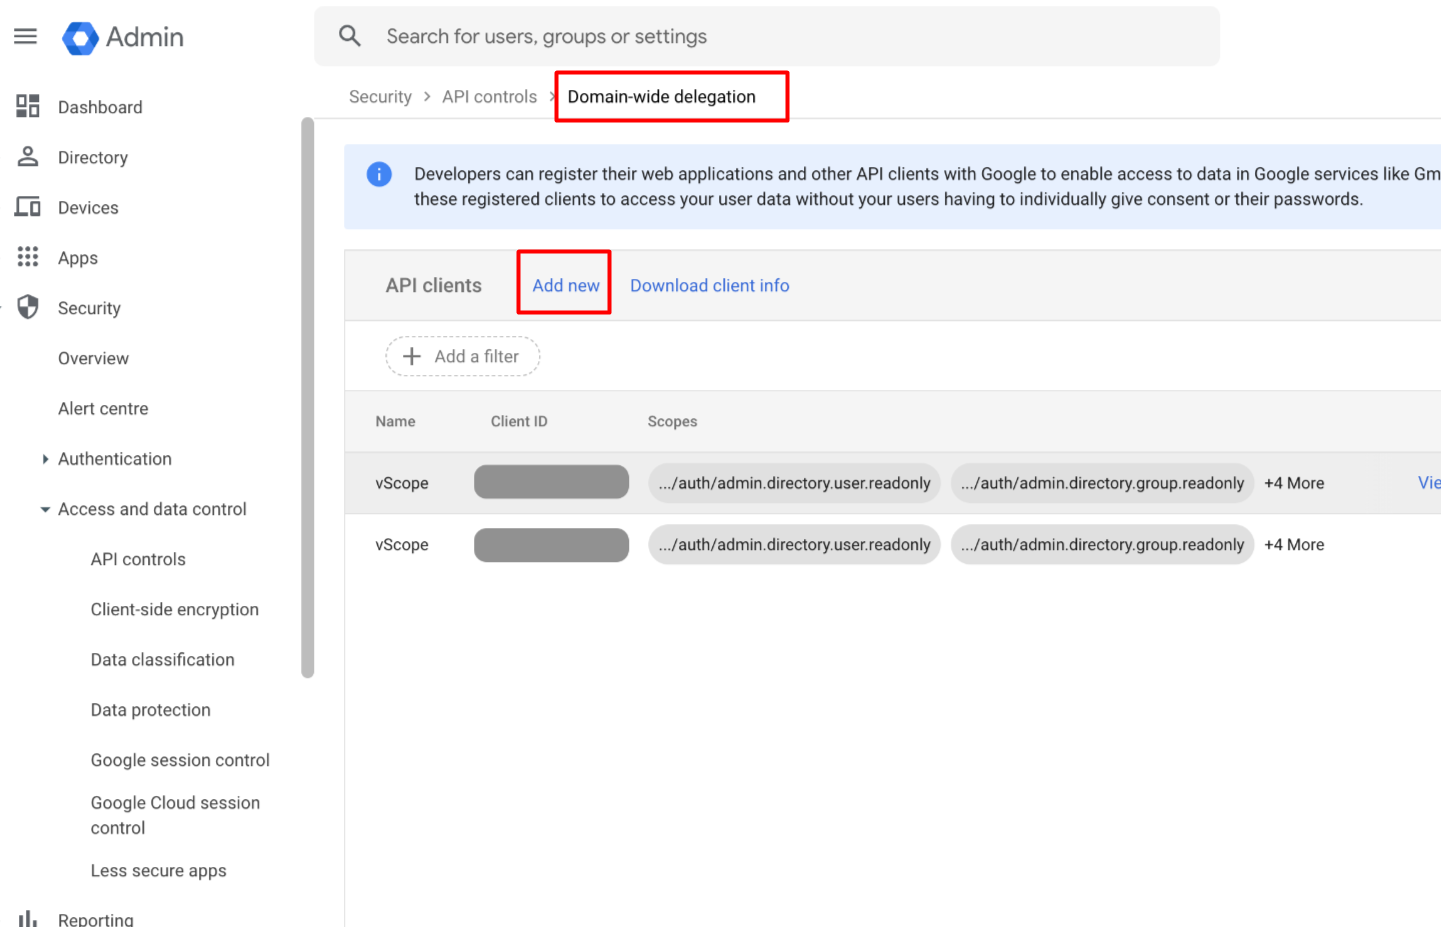
Go to API Controls in your Admin console* (Show More > Security > Acess and data control > API controls) , then click “Manage Domain-Wide Delegation”.
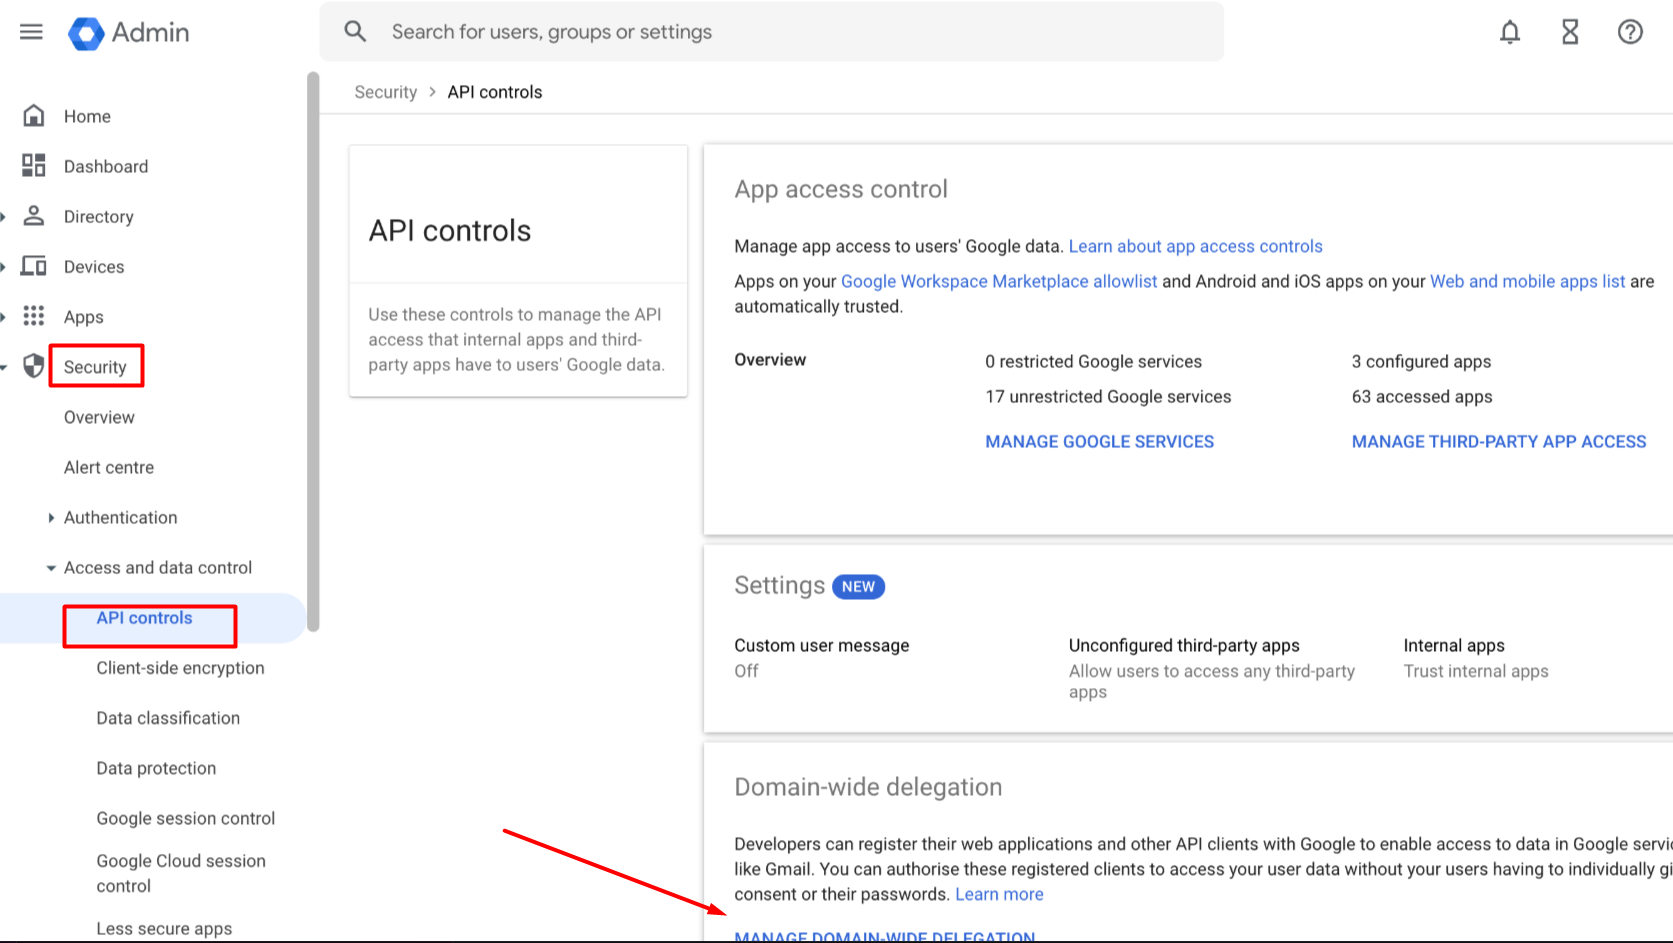
*you need super admin privileges to access this view!
b)
Click “Add new”.
c)
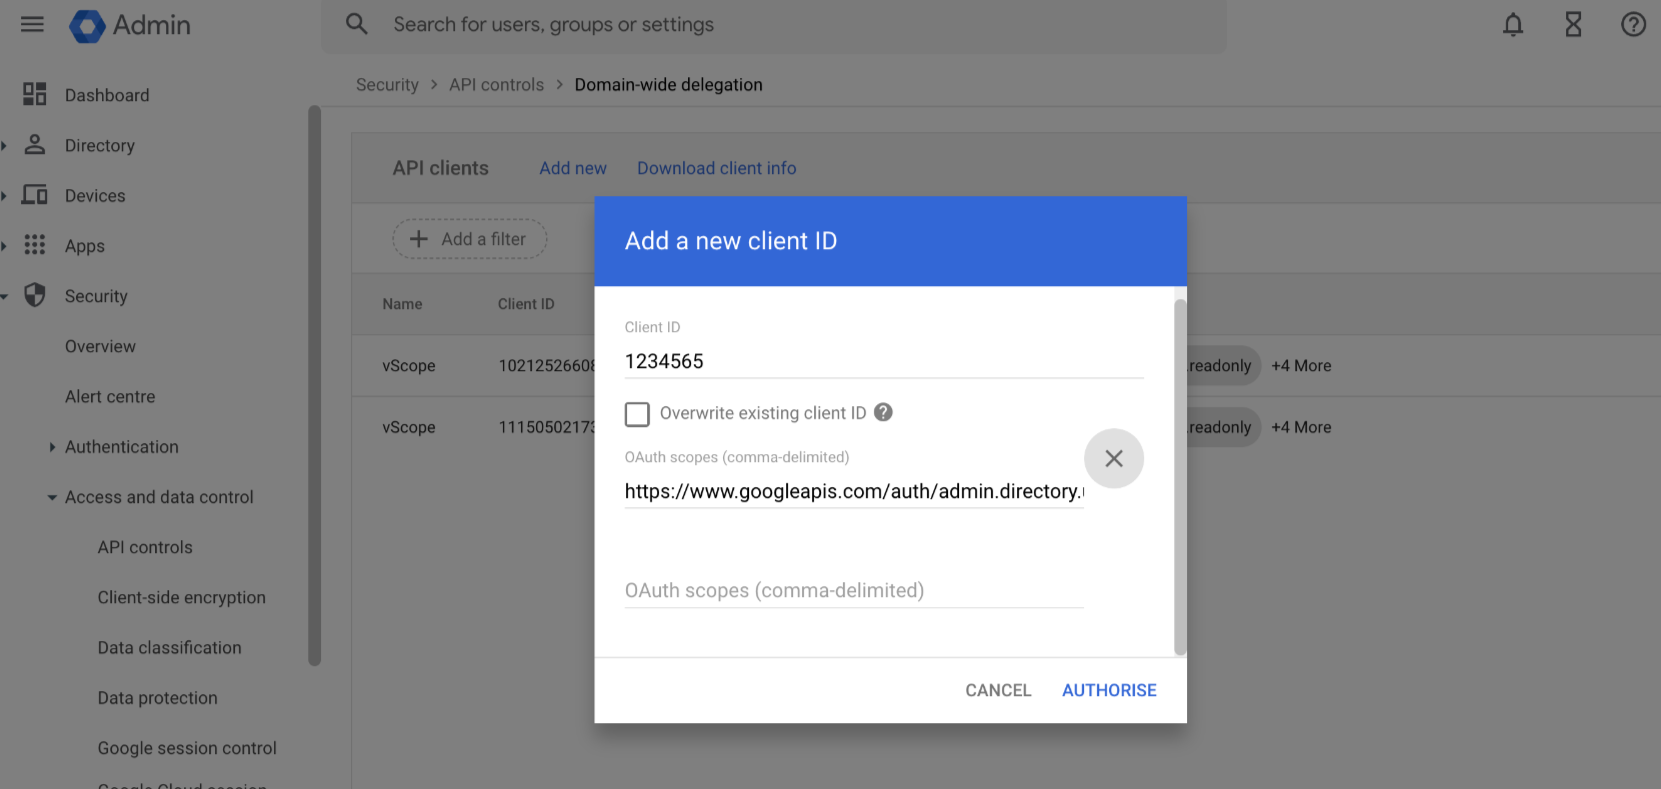
Copy and paste the client_id from the key we created earlier into “Client ID”, then copy and paste the following rows as “One or More API Scopes”. Make sure that they are separated by commas. Click “Authorise”.
https://www.googleapis.com/auth/admin.directory.user.readonly,
https://www.googleapis.com/auth/admin.directory.group.readonly,
https://www.googleapis.com/auth/admin.directory.device.chromeos.readonly,
https://www.googleapis.com/auth/admin.directory.orgunit.readonly,
https://www.googleapis.com/auth/admin.directory.user.security,
https://www.googleapis.com/auth/admin.directory.device.mobile.readonly
Step 4 – Enable API permissions
a)
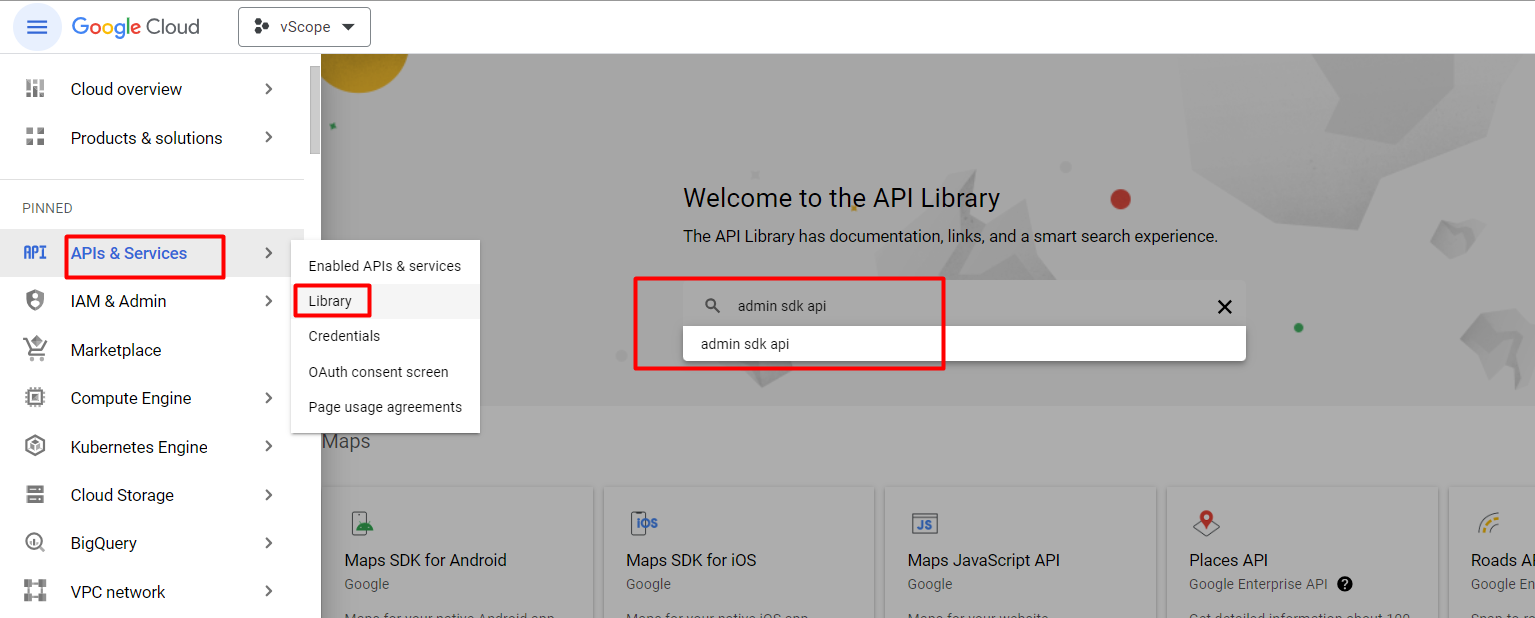
Now it’s time to grant the required API permissions. Go back to console.cloud.google.com and head over to APIs & Services -> Library. Search for “admin sdk api”.
b)
Search for “admin sdk” in the library and click on it.

c)
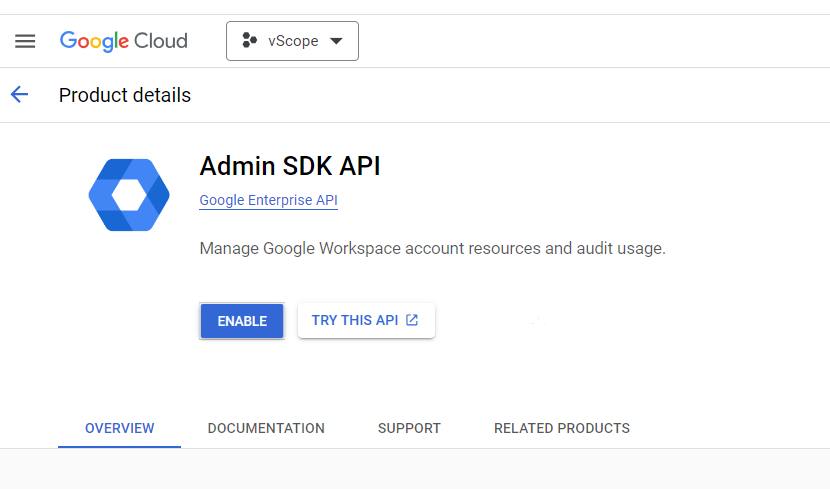
Enable the API permission by clicking on “Enable”.
Service Account and API Propagation Time
Please bear in mind that after creating the service account and enabling the APIs, you may encounter a propagation time before they can be used.
Step 5 – Enter the credentials into vScope
Now it’s time to enter the credentials into vScope and inventory your Google Workspace directory.
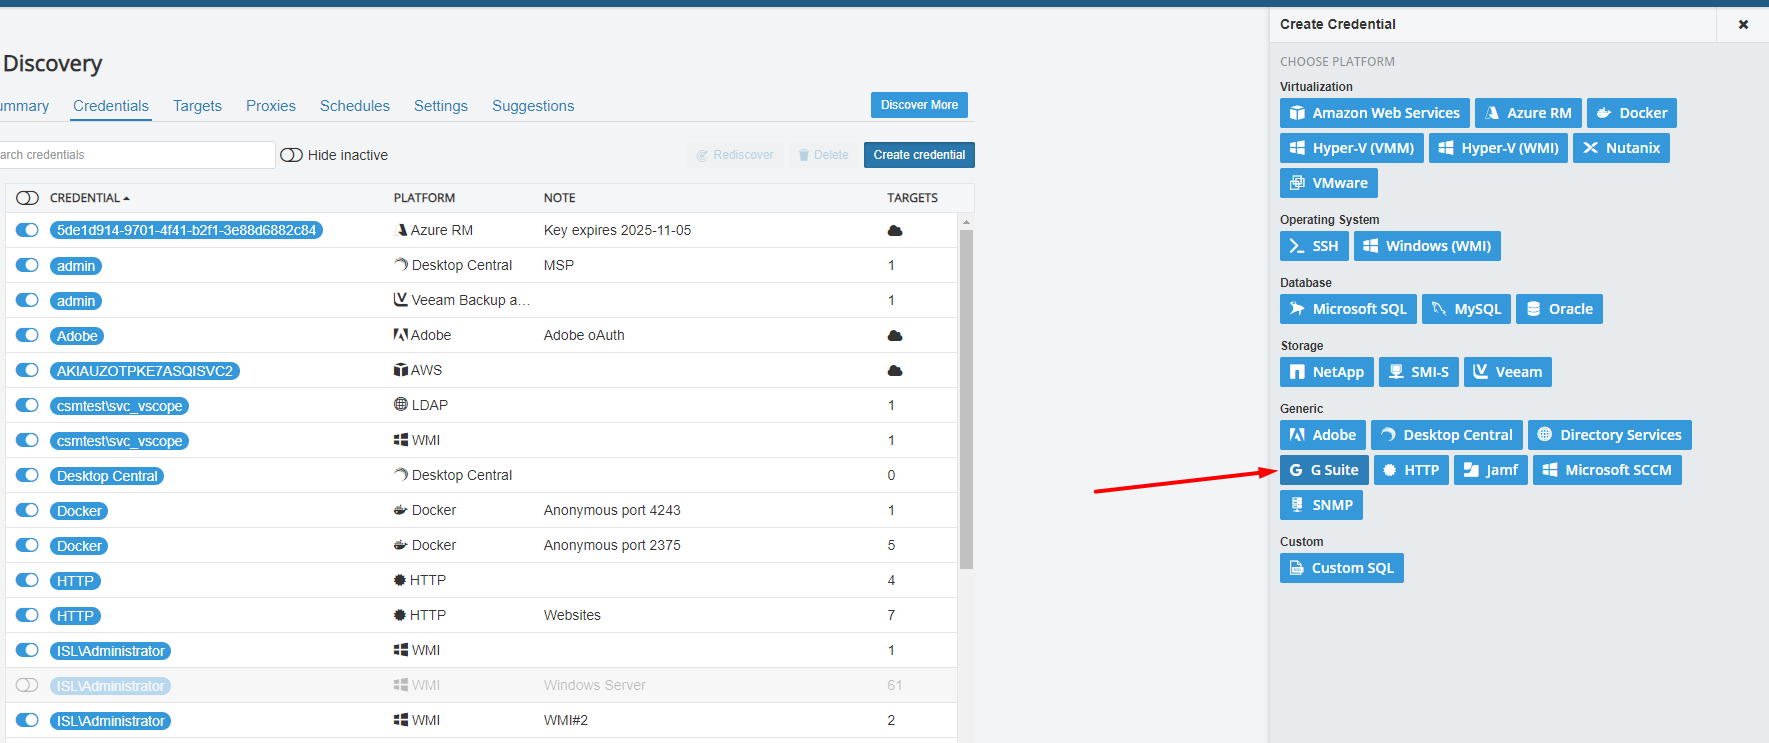
a)
Go to Discovery Manager -> Credentials and click on Google Workplace (G suite).
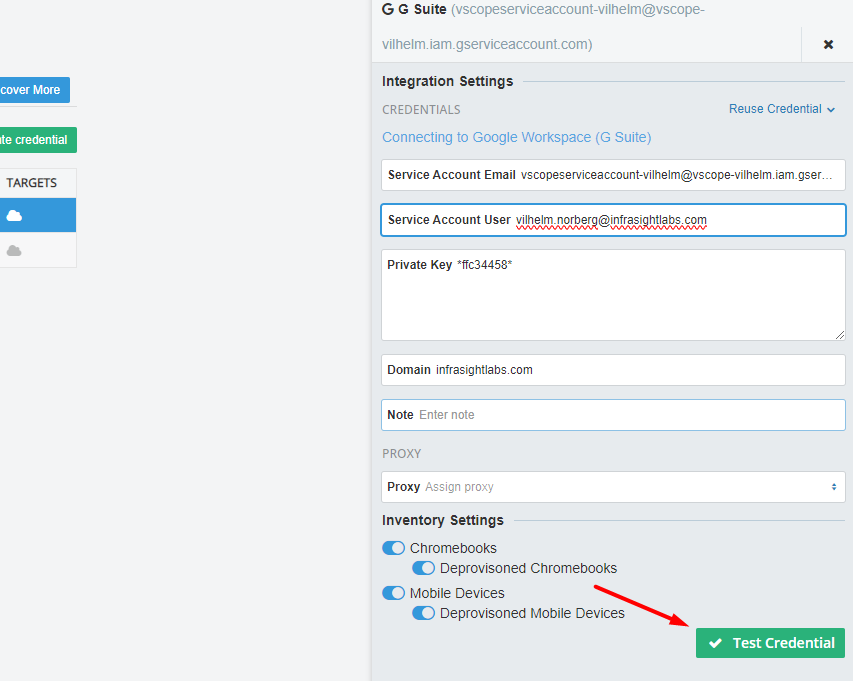
b)
Here are the requried credentials required:
- Service Account Email – Found in the key document from step 1 l)
- Service Account User – Use the email from an impersonated account with super admin privileges in Google Workplace
- Domain – The Google Workspace domain*
- Private Key – Found in the key document from step 1 l)
* You find your domain in Google Workspace, where your project is located.

Enter and test the credential before saving.
Need help?
Don’t hesitate to contact our Support at support@infrasightlabs.com. They are happy to help!