How to Setup HTTPS on vScope Web Server (Out-of-Date)
Notice: This article is the old HTTPS setup guide(!)
We strongly recommend uploading the certificate from the UI using this article: https://support.vscope.net/how-to-set-up-https-for-the-vscope-service/
To reconfigure the vScope web GUI to HTTPS, follow the steps below.
Windows
If you are using Windows the preferred method is to follow this guide using keytool. Keytool is an application that is installed with Java, hence Java is required. If you are performing these steps on the same machine that host the vScope installation then Java is already installed. To read more about keytool you can do so on the Oracle website.
Linux/macOS
If you are using Linux or macOS the preferred method is to follow this guide using openssl. Openssl is installed with the OS and should therefore already be available. If that is not the case then refer to your operating system manual on how to install it. You can also follow this guide using keytool on Linux/macOS if you have Java installed. If you are performing these steps on the same machine that host the vScope installation then Java is already installed.
Self-signed certificate
A self-signed certificate is a certificate that is signed by the same entity whose identity it certifies. This option will result in a working certificate but your browser will display a warning that the page is not secure. The traffic is still encrypted.
To generate the certificate type the following in a terminal and follow the instructions on the screen:
Using keytool
keytool -genkey -keyalg RSA -alias vscope -keystore my_certificate.p12 -keysize 2048 -storetype pkcs12 -validity 365
This will generate a certificate, my_certificate.p12, that is valid for 365 days.
Using openssl
openssl req -x509 -newkey rsa:2048 -keyout key.pem -out cert.pem -days 365
openssl pkcs12 -export -inkey key.pem -in cert.pem -name vscope -out my_certificate.p12
The first command will generate a certificate that is valid for 365 days. The certificate consists of two files, key.pem and cert.pem.
The second command will take the two files generated from the first command and bundle them into one file, my_certificate.p12. You can safely delete key.pem and cert.pem since we will only need my_certificate.p12.
Skip ahead to Add your certificate to vScope.
Use an existing certificate
If you already have a certificate it will have to be converted if it’s not in a format that vScope can use.
Depending on the format of your certificate this step could require the use of `openssl`.
If you have one file
If you only have one file then it’s most likely of the PKCS#12 format which contains both the private and public keys. Usual file extensions are .p12 and .pfx.
If this is the case then you can skip right ahead to Add your certificate to vScope.
If you have two or more files
If you have two or more files then one of the files should be your private key and the other file should be your public key. Any additional files are usually intermediate certificates that also need to be included for the certificate to be properly verified. In order for vScope to use your certificate we will need to combine them into the PKCS#12 format which will store both keys in one file, as well as any intermediate certificates.
If your private key is encrypted you will need to decrypt it first by running:
openssl rsa -in encrypted.key -out key.pem
If one of your files has the extension p.7b or .p7c you will need to run the following command first:
openssl pkcs7 -print_certs -in cert.p7b -out cert.pem
Using openssl
If you only have two files then use the following command. Be sure to substitute with the real filenames:
openssl pkcs12 -export -inkey key.pem -in cert.pem -name vscope -out my_certificate.p12
If you have intermediate certificates you will first need to combine them with your public key in one and the same file. The order of the certificates is important.
On Linux/macOS run the following command. Be sure to substitute with the real filenames:
cat cert.pem intermediate.pem > combined.pem
Or on Windows by running:
type cert.pem intermediate.pem > combined.pem
Finally run:
openssl pkcs12 -export -inkey key.pem -in combined.pem -name vscope -out my_certificate.p12
Using keytool
For use with keytool you will need to combine all your files into one file. The order of the certificates is important.
On Linux/macOS run the following command. Be sure to substitute with the real filenames:
cat cert.pem key.pem intermediate.pem > all.pem
Or on Windows by running:
type cert.pem key.pem intermediate.pem > all.pem
Finally run:
keytool -import -trustcacerts -alias vscope -keystore my_certificate.p12 -deststoretype pkcs12 -file all.pem
Troubleshooting
If one of your files are binary instead of ASCII then it is not in the PEM format assumed above. The binary format is called DER and you will need to convert any file in DER to PEM in order for the commands above to work.
This will require openssl. If you are using Windows then binaries can be downloaded from here.
openssl x509 -inform der -in -out cert.pem
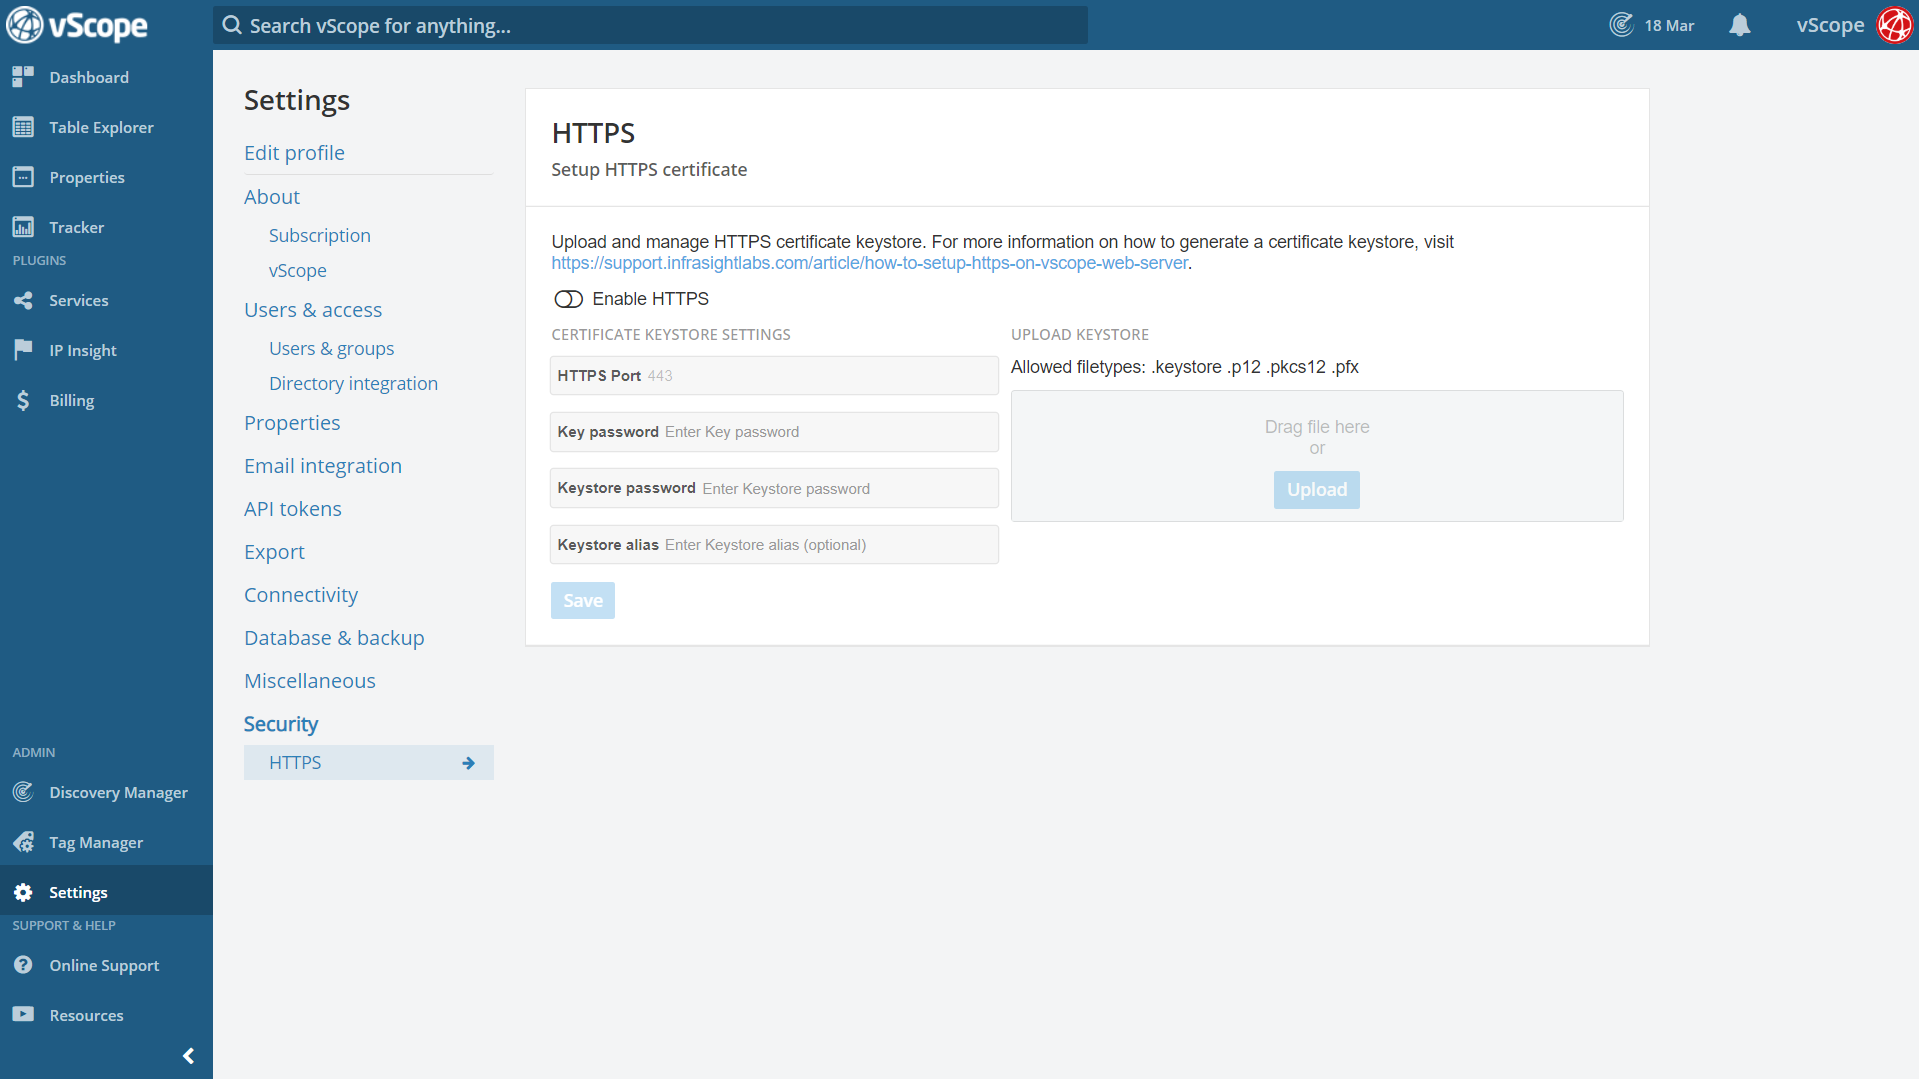
Add your certificate to vScope by uploading the keystore (Introduced in vScope 3.14)
You can setup the HTTPS certificate from the Security settings in vScope. Simply:
- Upload your keystore.
- Provide the required information about the certificate keystore settings and click save.
- Restart the service and give the it some time to start up again.
- Done!
Important before you start!
- Ensure the inbound firewall rules have the HTTPS port enabled on the vScope server. Default 443.
- The “Key password” and “Keystore password” can be the same in some cases.
Add your certificate to vScope (Before vScope 3.14)
Now we need to tell vScope to use your certificate. Make sure you have your jetty.p12 file handy. First you need to find the directory where vScope stores its configuration. We will refer to the path to this directory as VSCOPE_PATH. The default paths are listed below:
Windows: C:\vScopeData
Linux: ~/.vScopeData
macOS: ~/.vScopeData
For the purpose of this guide we will place my_certificate.p12 in the same directory as the vScope configuration file. The certificate can however be placed anywhere as long as vScope has read access to the file. You will see how we have to specify the path to the certificate in the vScope configuration file below.
Usually you will want to set very restrictive permissions to certificates to prevent them from falling into the wrong hands. For the purpose of this guide we will skip that part.
Now we need to shut down vScope as we are about to update the configuration file.
Once vScope is no longer running place my_certificate.p12 in VSCOPE_PATH/configuration and then open config.ini located in that same directory.
Add the following lines to config.ini and substitute PASSWORD and VSCOPE_PATH with the actual password and path:
# Enable SSL (default disabled)
org.eclipse.equinox.http.jetty.https.enabled=true

# Set SSL port (defaults to 443)
org.eclipse.equinox.http.jetty.https.port=443

# Path to the keystore containing the SSL certificate
org.eclipse.equinox.http.jetty.ssl.keystore=VSCOPE_PATH/configuration/my_certificate.p12

# Password for keystore
org.eclipse.equinox.http.jetty.ssl.password=PASSWORD

# Uncomment the following line to disable http. Will redirect to https if left enabled.
# org.eclipse.equinox.http.jetty.http.enabled=false
ONLY replace “VSCOPE_PATH”, “PASSWORD” and “my_certificate.p12” with your actual values.
Save and close the file once you are done.
Last step
Start up vScope again and wait for it to finish booting up.
If you did not disable http in the configuration then accessing vScope over http will cause a redirect to https. If you did disable it then you will have to explicitly access vScope over https.
If everything is working you will be presented with the web UI and the browser should indicate that the content is being served over https.
As a last step we will need to update Base URL to reflect the change from http to https. Navigate to the Settings page, then Miscellaneous and set the Base URL setting. Make sure the address is correct and that it begins with https://.
Common errors
Still not working? Make sure that:
- The folder paths are correct
- There are no excess spaces in the config.ini file
Need help?
Our support team are always happy to be of assistance! Get in touch with them at support@infrasightlabs.com.